# Upload data automatically to SharePoint
The new **SharePoint upload utility** allows you to upload exported Notes data from a staging folder to a **SharePoint library** or a **SharePoint list**.
The utility launches automatically after a [**database export**](https://docs.swingsoftware.com/seascape-for-notes/archiving-with-seascape/creating-a-sharepoint-archive/export-database) is completed from the SharePoint archiving page.
You can also launch it manually by using the **Upload existing archive** link on the SharePoint archiving page:

Below are the instructions for uploading the Notes data from a staging folder into a **SharePoint Library** or a **SharePoint list**.
### **Step 1**
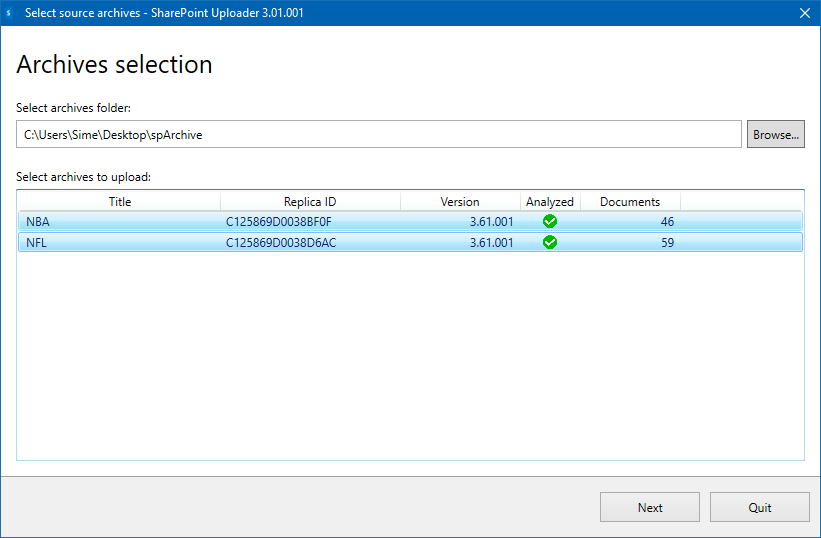
When the SharePoint upload utility launches, click on the **Browse** button to select the **staging folder** where you exported your Notes data.
After the **staging folder i**s selected, the utility will automatically list all of the archive folders found in it.
Select **one or more** archive folders you wish to upload to SharePoint and click **Next**:
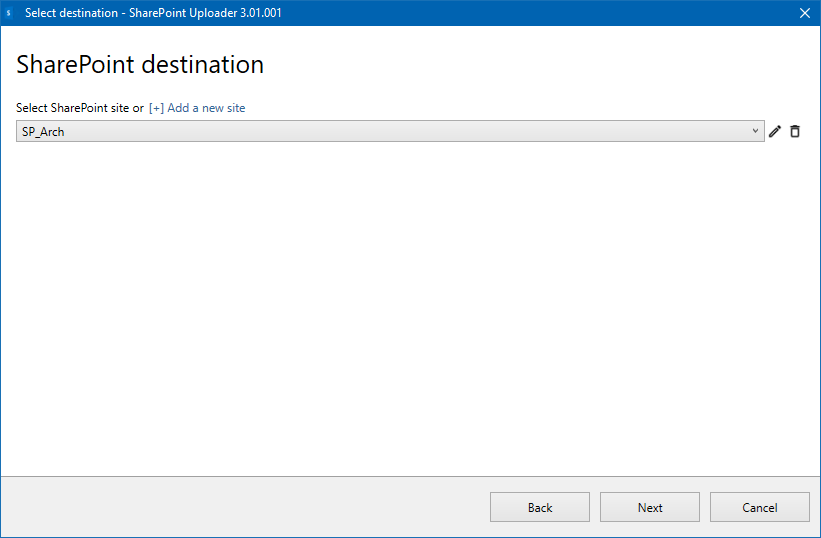
### Step 2
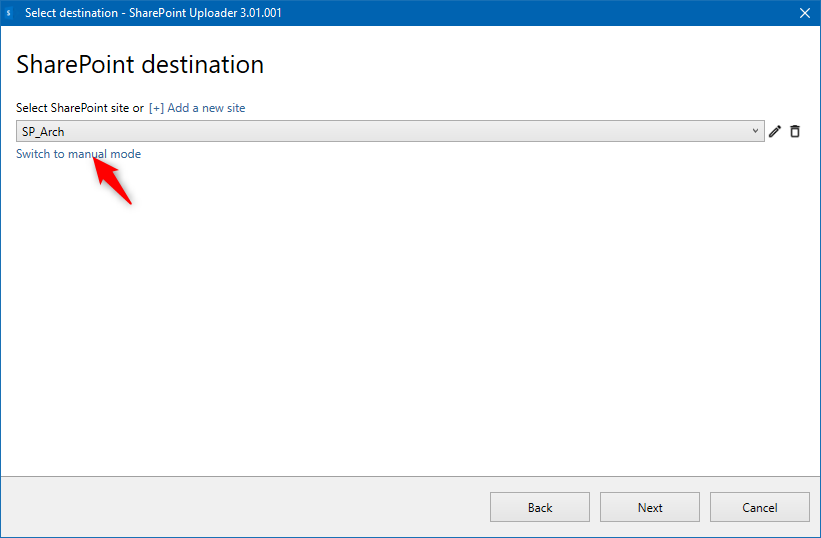
In **Step 2**, after clicking **Next**, click **Add a new site** to create a new SharePoint site connection or select an already existing one using the drop-down menu.
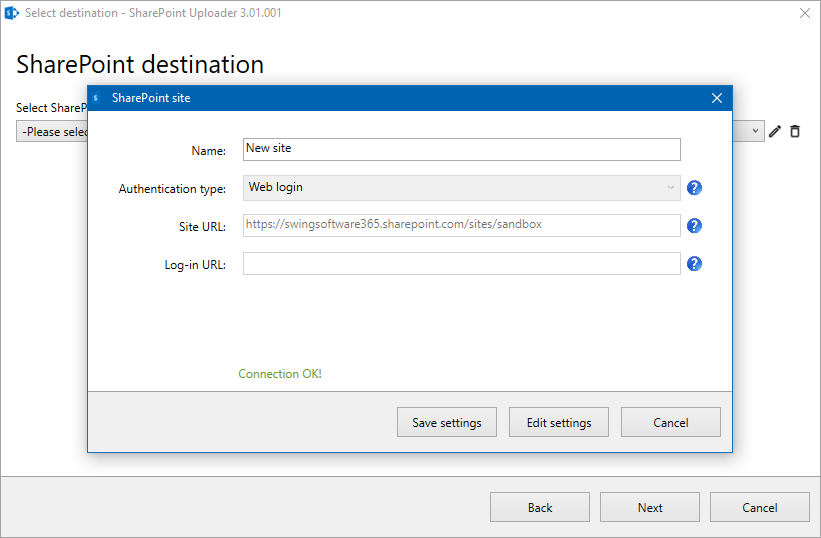
The connection settings popup now appears where you can enter your SharePoint site URL and test the connection.
{% hint style="info" %}
The Site URL should be in the following format (without the .aspx part or any additional folders in the URL): [https://yourdomain.sharepoint.com/sites/yoursitename](https://swingsoftware365.sharepoint.com/sites/LotusNotesData)
{% endhint %}
If the connection is established successfully, click **Save Settings** so you can re-use the settings for your future uploads:
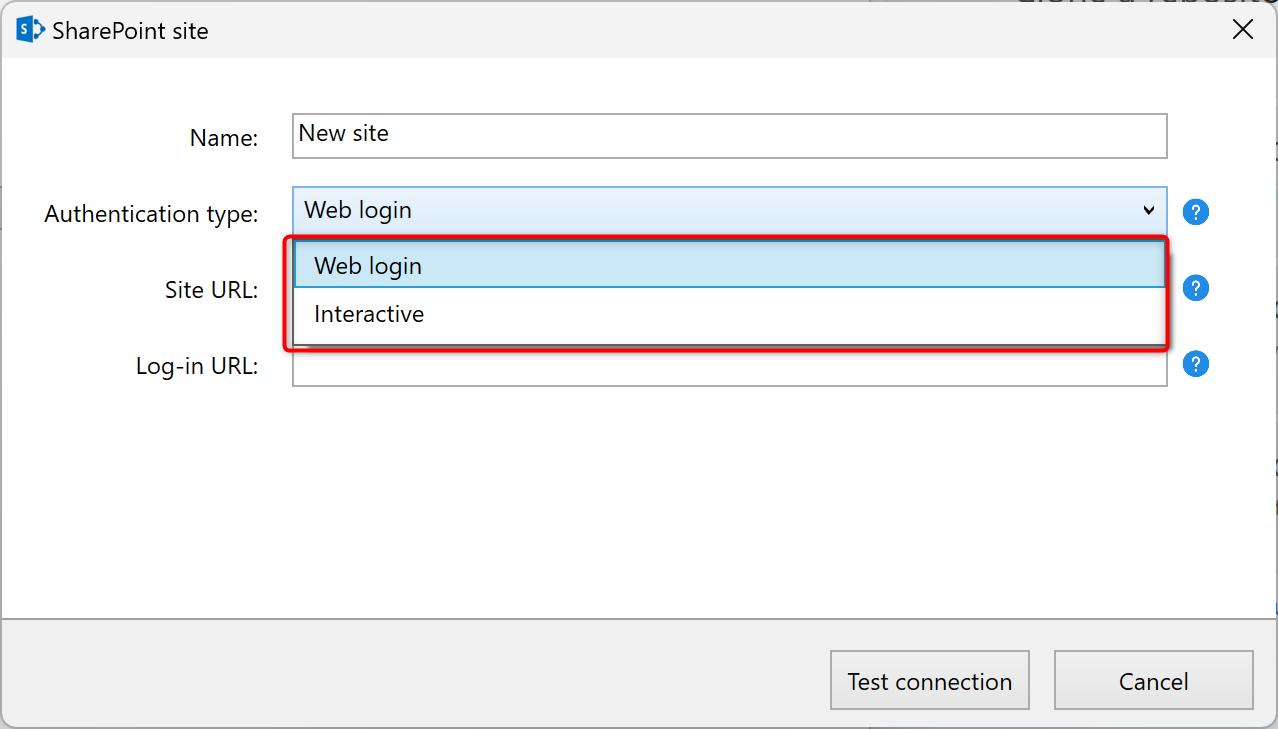
**Note:** Use the Authentication type to change the authentication method if needed:
**Web login:** Log in to SharePoint Online or on-premises using a web browser. Requires claims-based authentication with the FedAuth cookie. If you are previously logged in to SharePoint in the web browser on the machine where you are trying to do the upload, then it is enough to enter the "Name" and "Site URL". You can leave "Log-in URL" empty.
**Interactive:** Requires you to have the Entra application registered on . The user will be prompted for authentication. You will also need to have your Tenant ID.
{% hint style="info" %}
If you have chosen one archive to be uploaded, then you will have an option to switch to the manual mode of uploading your Notes data.
For more information about manually uploading your data into SharePoint, click [here](https://docs.swingsoftware.com/seascape-for-notes/archiving-with-seascape/creating-a-sharepoint-archive/manual-upload-data-to-sp).
{% endhint %}
After clicking on Next, a review of the upload will show. You will have an option to create a new library for each archive or to upload to an existing library (or list).
Here is a description of the upload settings:
* **Shorten Notes canonical name to common name:** "CN=Mary Tsen/OU=Illustration/O=Acme" becomes "Mary Tsen"
* **Publish documents after upload (Check-In):** Documents will be published after upload (if unchecked, the uploaded documents will be saved as drafts)
* **Overwrite existing documents:** Documents with the same PDF file name will be overwritten
When you're finished, click **Start upload.**
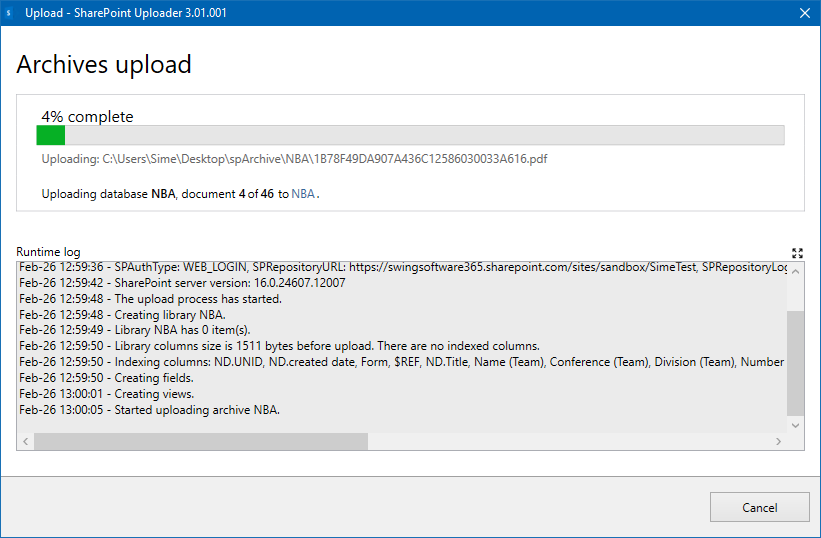
During the upload, the upload progress information will be shown in the popup window:
Once the upload is complete, an overview of the uploaded data will be shown, and **links to the SharePoint libraries** will be provided, allowing you to navigate to the libraries directly.
All your data will be in the created SharePoint library. You will be provided with links to responses and attachments for each document.
For each Notes form, one view will be created that will show documents created with that Notes form Attachments view will be created if the archive has attachments, and a Responses view will be created if the archive has response documents. You can easily switch between views in SharePoint.